I had a tough time in choosing what to work on next after my somewhat lukewarm fluffy sweater project. My ideas were wandering from tweed jacket to jeans, then to trench coat. The spring had sort of started, and yet now quite – it would be sunny more often, but still really cold. And I couldn’t manage to come to my senses and shift the mindset from deep, cold, and dark winter to something else. That’s why it felt too early to work on a trench coat and so I decided to make a silk blouse instead.
I bought this absolutely gorgeous floral silk fabric couple of years ago. I liked it so much that it felt ok to purchase the last leftover that came in two pieces. At first I was planning some kind of dress out of this fabric. But as it had become abundantly clear, I no longer needed more dresses, so all my fabrics have since been reassessed in trying to find other good uses for them apart from dresses. This silk is almost sheer, too. So it would have probably been a bit too light for a dress. And so I decided to go ahead with a blouse project for this fabric. I’ve been in an unsuccessful search for a good shirt or blouse pattern for a long while. During last half a year I’ve purchased quite a few different shirt patterns by different pattern makers hoping that at least one of them would work. This ought to be an excellent opportunity to try one of those new patterns out! And this time it was a success!
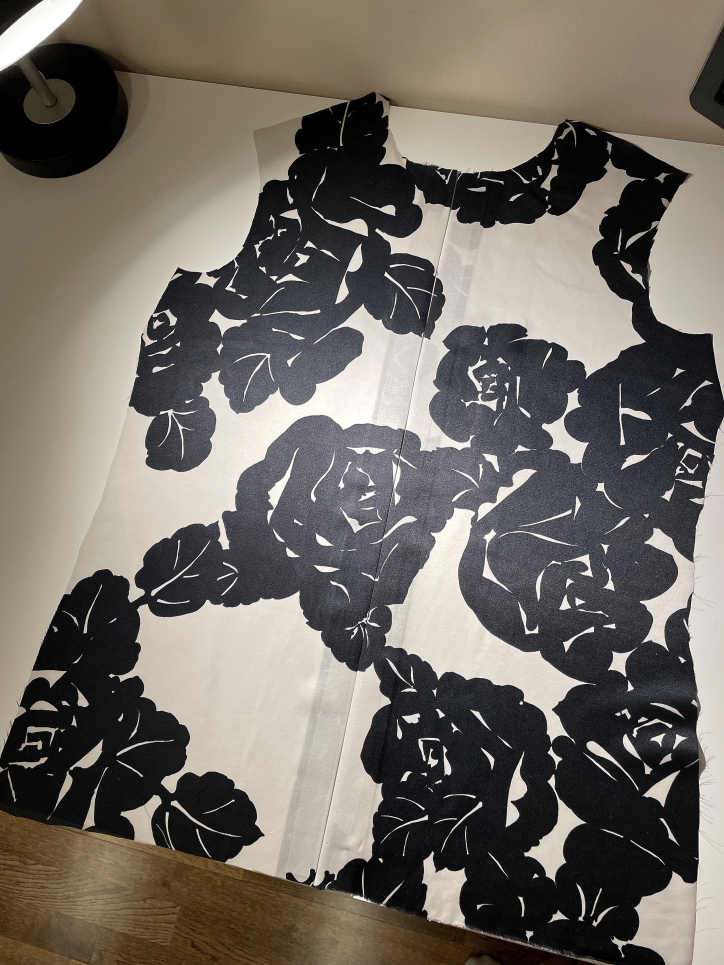
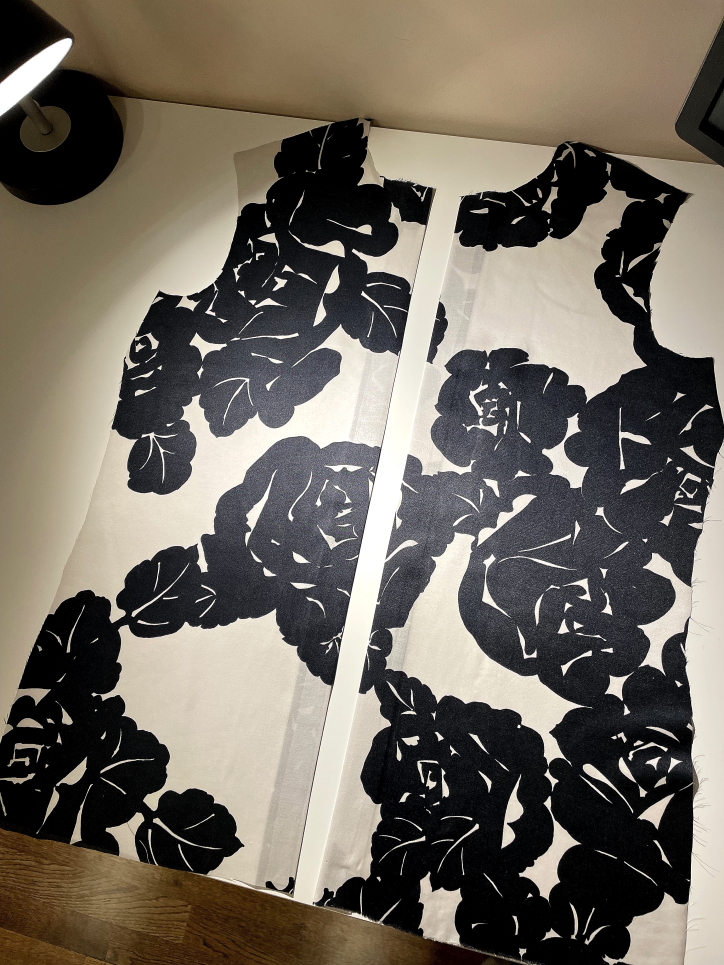
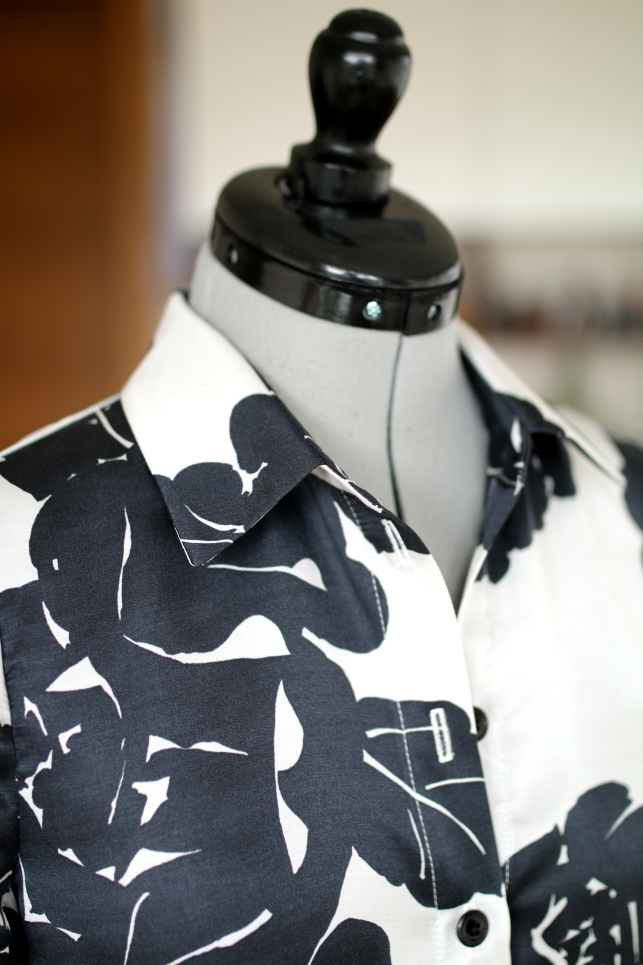
Working with silk is tricky, especially when that’s a lightweight silk like I was dealing with this time. First, you’ve got to cut that terribly slippery and unruly fabric. There is really no other sensible way than laying the entire fabric piece on the floor and trying to convince it to behave. This time with this beautiful floral pattern I was also trying to match the pattern across the front closure. And I almost succeeded… I did match the pattern perfectly for the unbuttoned blouse, unfortunately (or in fact fortunately 🙂 ), this blouse has to be buttoned up, and then the pattern no longer matches. Fail! I considered cutting out one front piece anew in order to correct the mistake, however due to fabric motif being quite large, the only option to cut it was pretty much destroying a good piece of fabric – see the last picture in the slideshow below for evidence. And that’s why I decided to live with that mismatched front and keep a decent piece of fabric intact for another project (that piece is 1.5 meters long in fact, so worthwhile saving).
Ok, so there are few types of garments that require rather disproportionate amount of work if compared to the significance of the garment. That is vests and shirts. And also vice versa – there are pretty simple garments that can be made quickly and yet look impressive, for example certain types of dresses or even a straightforward coat. I knew from the very beginning that this ain’t gonna be a simple project, and it wasn’t. Few complications were self-inflicted, for example I had decided to make all seams as French seams, which by definition means more work, but looks a hundred times better! Honestly I wouldn’t dare finishing seams of a silk garment by overlocking them. In this case seam allowances were quite narrow 1 cm (3/8 in), which meant that for French seams I had to stitch at 4 mm seam allowance first and then at 6 mm seam allowance. It’s terribly narrow, especially while installing sleeves and stitching on a curve, for such a slippery fabric as silk. But I did manage somehow.
The background of this fabric is not quite white, it’s rather off-white really. That’s why I was conscious in matching fusible interfacing and thread to this off-white background. Had I used snow white notions, they would have been shining too much in comparison to fabric. So I used lightweight beige interfacing and rosy-beige thread for this project.
At first I thought that I’d get away with silicone foot on my sewing machine. But this was not enough – seams would get pulled and ugly. I had to use that terribly bulky but always reliable walking foot for pretty much all the seams. What it does is transport the upper layer of any slippery fabric better than a regular or apparently also silicone foot. I’ve found it useful to also increase presser foot pressure in order to make seams as neat as possible in slippery fabrics.
While installing the collar I always first of all tack the inner piece of the collar stand in place as that’s the only way to control the situation while stitching in the ditch from the right side. Usually when I have to stitch in the ditch, I repurpose blind hem foot. It has a small protrusion underneath it, which can work as a guide and stay in the ditch while sewing.
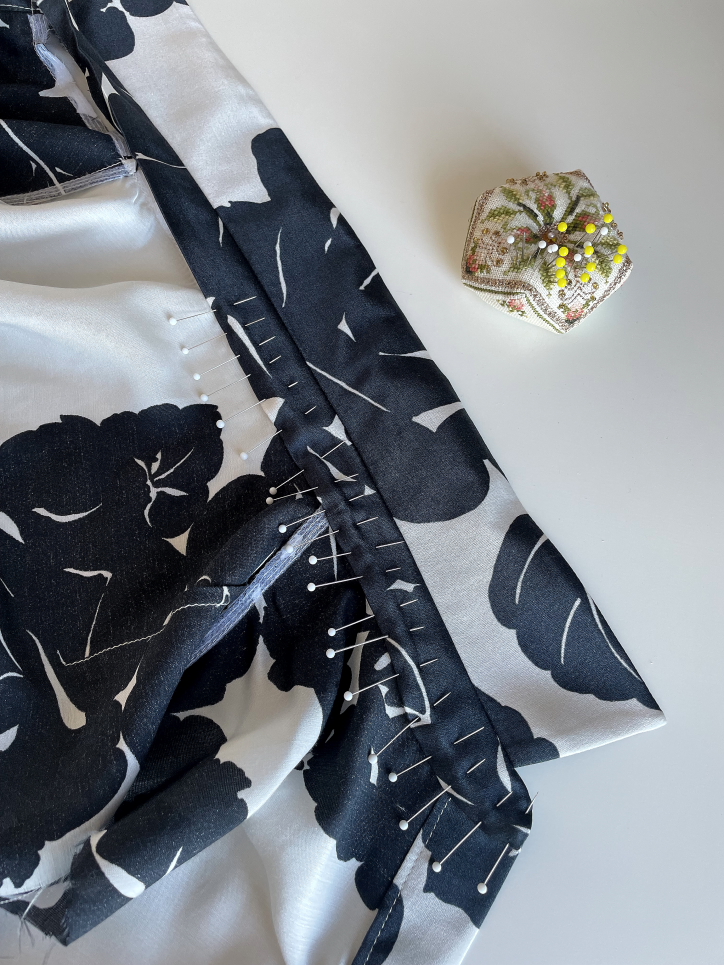
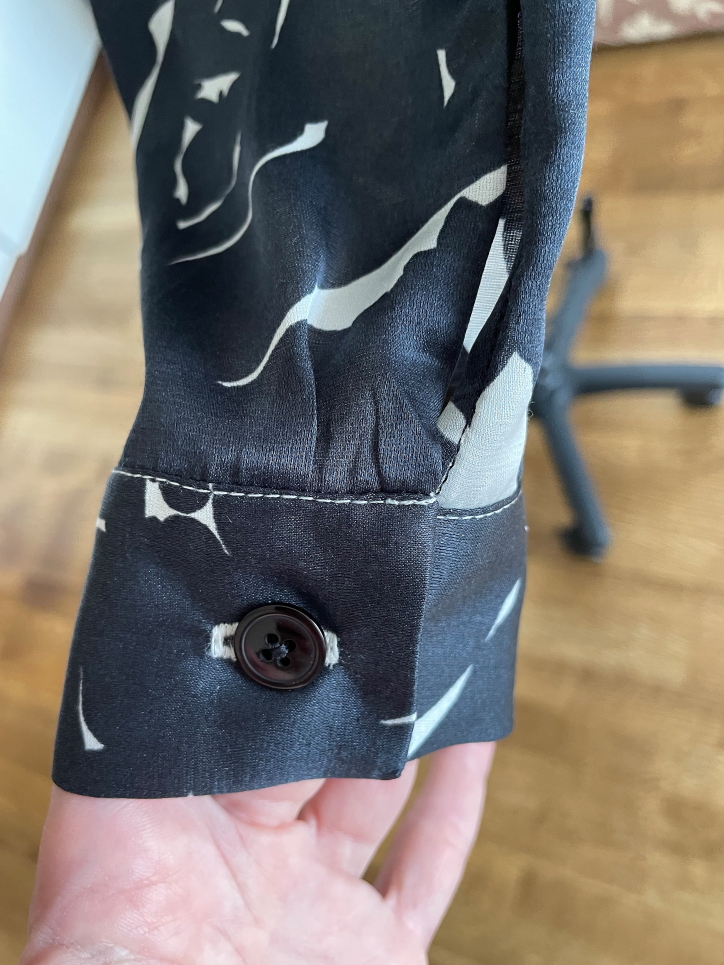
Next major step was making and installing sleeves. I wish this blouse design would have proper sleeve plackets – I love them so much! But it doesn’t, it has narrow binding finish of sleeve openings at the cuff (see the picture in the slideshow below). Arguably, it is a very sensible finish for a silk blouse. But since I was hoping for this pattern to work so well that it could be used for future cotton projects, wider sleeve plackets would have been handy.
Anyway, narrow binding it was and it had to be installed. I did fiddle with it quite a bit – not too surprising provided that this meant working with very narrow seam allowances and narrow bindings. When that was done, I installed cuffs, and luckily managed to not make any mistakes along the way! I’ve made my share of mistakes in installing cuffs before to know better, so I was paying proper attention this time and double checked which way the cuffs should get attached. When sleeves were done, the last step was to install them. Since sleeves installation seam also was supposed to be done as French seam, I stitched veeeery slowly. My sewing machine has speed regulator which is almost never used, as I’ve accustomed to regulate the speed with the pedal. But this time I moved that speed gauge to pretty much the slowest setting and did take my time. This tactics paid off and sleeves went in pretty much without an incident.
Finally, button holes were made, one of them had to be ripped as I’ve run out of bobbin thread in the middle of operation… Luckily, it was not a big problem as I’d interfaced front opening plackets really well. When this was done, 10 black buttons were attached, and with that my brand new silk blouse was complete!
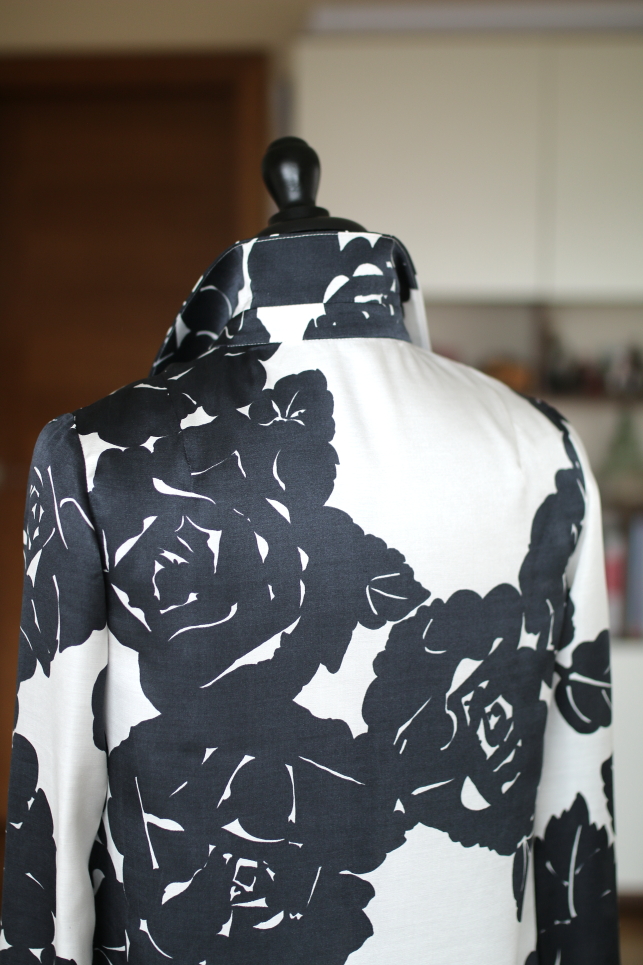
I’d call this a pretty successful pattern. I love the collar and sleeves of this blouse very much, the only small drawback is that it is a tiny bit tight around the upper back. This is a very strange problem for me because with my shoulders being quite narrow I usually have an opposite problem in that there’s usually too much room for me in garments around shoulders and upper back. But there we were this time. It’s not too tight for me per se, but if it was wider just a tad, that wouldn’t do any harm. I imagine for someone with shoulders of regular width this blouse would probably be somewhat uncomfortably tight. So if and when this pattern is used next time, I’ve made a note to add 0.5 cm on each side to upper back width.
For this blouse I needed 1.25 m of this beautiful floral pure silk twill. Pattern used here is Esmi by Vikisews. Other notions used for this project were: a bit of lightweight beige interfacing for collar, collar stand, cuffs and front plackets (35 g/sqm), a bit of interfacing tape to stabilize shoulders, 10 black buttons of 1.3 cm diameter, and coordinating thread. This blouse cost me 40 Eur, it took approximately 15 hours to make. It was made in March, 2024.
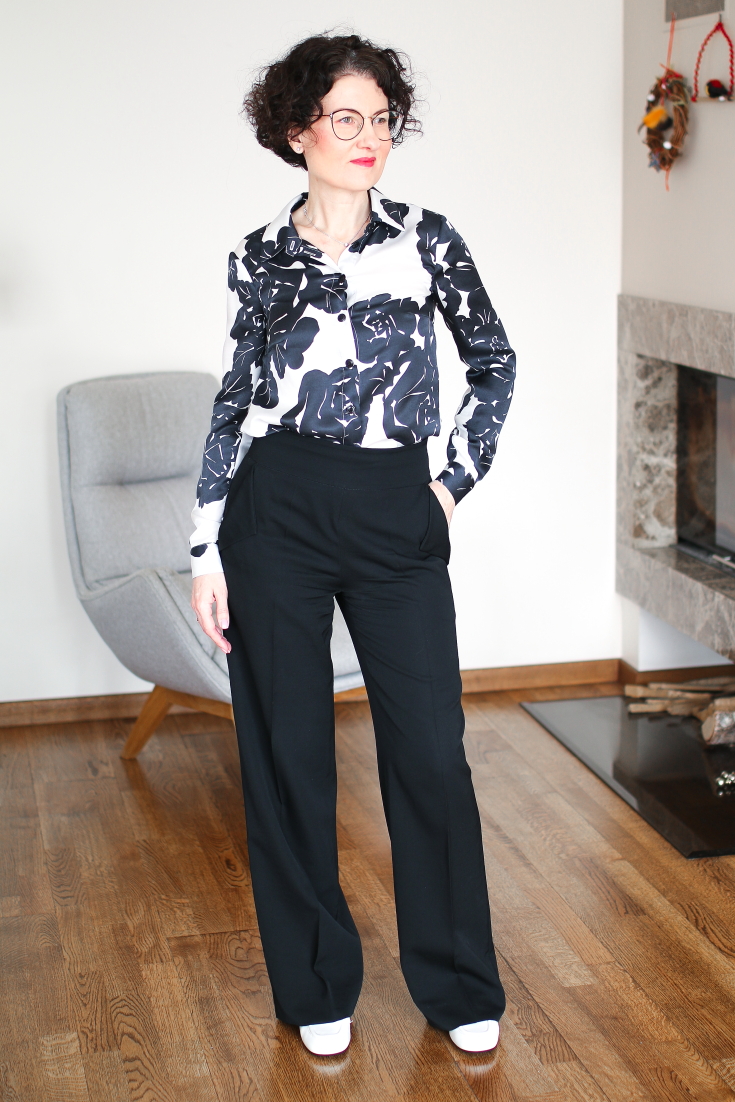
I really love this blouse! I feel that the curse on shirts that I thought I was experiencing might have been lifted! 🙂 I’ve spent so long in search for a good shirt pattern, and my recent attempt had not been too successful, so I was really hesitant to attempt a shirt project one more time. And here we go – apparently shirts can be successfully made, which is a great news for me as I love wearing them!
And now, I think, the time has come for me to tackle a trench coat. How about that? 🙂 I’ve purchased this gorgeous peach/pink cotton last year thinking that I’d manage to make a trench coat for last spring, which clearly hasn’t materialized. With spring now clearly approaching I’d like to try once again and be on time for this spring. Let’s see how that’ll work!
Thanks for visiting my blog and I’ll see you next time!
~Giedre~





Lovely blouse.
LikeLike
Thank you so much! ☺️
LikeLike
1 cm French seams. Yikes! I can only imagine how nerve wracking that must have been. As far as the “mis-match”. I think it actually adds to the overall look. Stunning.
LikeLike
Oh yes, those narrow French seams were tricky! The standard seam allowances of this particular pattern maker are 1 cm, not too friendly to French seams 😊 I had quite a head scratcher about that mismatched front. But now I’d agree with you that it looks just fine as it.
LikeLike